NEED HELP with your WEB PAGE ? (FRONTPAGE EDITOR)
1. Open Frontpage Editor.
2. From menu bar at top of
screen click and hold FILE
and choose OPEN A WEB.
3. In blank where it says Folder name type in your state web address EX: http://xx000.k12.sd.us
4. Click on OPEN
5. A window will come up to ask for your password.
 |
Your Name is the first part of
your web page address. EX: kr021 Your password should have come with your
web account. |
6. Fill in your name and password and click on OK.
7. Your Homepage (default) should come up. This page needs to stay named DEFAULT. It is the page that shows up when someone goes to your webpage.
8.The next time you OPEN A WEB, this page should show in
the
window as a choice.
9. Add information to your page and SAVE.
EDITING YOUR PAGE (after the 1st time):
1. Open INTERNET and type your web address in the ADDRESS window.
2. From the menu bar along the top of the screen choose EDIT with FRONTPAGE.

OR go to START (at bottom left of your screen) and choose Frontpage from the menu list.
3. The following log-in screen will appear.
|
Your Name is the first part of
your web page address. EX: kr021 Your password should have come with your
web account. |
5. Type in your name and password and click on OK.
6. Your homepage (default) should appear.
This page needs to say named DEFAULT. It is the page that
shows up when someone goes to your webpage.
Choose the page you wish to edit from
the menu column on the left.
(Double click on the icon next to the page, not on the page name)
![]()
ADDING ANOTHER
PAGE
1. In the menu bar at the top of the
page under FILE, choose NEW and then PAGE.
2. A menu box with choices for
kinds of pages will appear.
Unless you want something fancy, choose NORMAL PAGE.
3. A blank page will appear. Add your information.
4. Then under FILE choose SAVE. It will automatically name it whatever you typed as your first line. If you want the name to be different than this, you must type in the name you want in the FILENAME box. When naming pages don't use spaces, periods, or other symbols like %, &, # etc. If you must have a space in the name use the __ underline key. EX: Math_assignments
5. Choose OK. The new page is now in your web folder and you can edit and resave it.
![]()
LINKING TO a spreadsheet, Powerpoint, or word
document:
(First you must IMPORT the file into your webfolder. Then add a hyperlink
to the file.)
IMPORTING a spreadsheet or word document:
1. Open your INTERNET EXPLORER and type your webpage address in the window. Once you page appears choose EDIT WITH FRONTPAGE EDITOR. (see below)
2. A log in box will appear and you will need to put in your Login name and password.
|
Your Name is the first part of
your web page address. EX: kr021 Your password should have come with your
web account. |
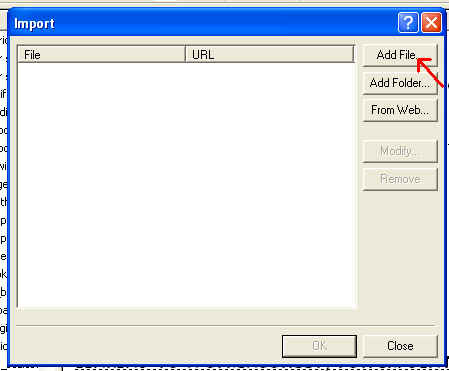
| 3. Once you are in to editing mode, choose FILE then IMPORT |  |
| 4. A box like this will appear: Choose ADD FILE |
 |
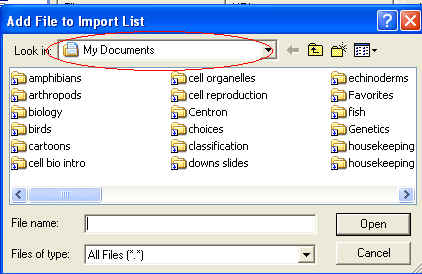 |
5. Change the LOOK IN: window to wherever you have the file saved (My Documents, on a disc, etc). Highlight the word document or spreadsheet file you wish to link then choose OPEN. |
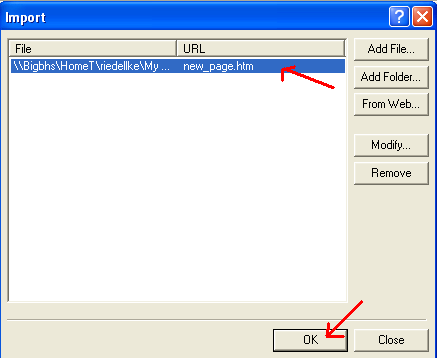
| 6. The name of the file should appear in the IMPORT/ADD A FILE window. Choose OK |
 |
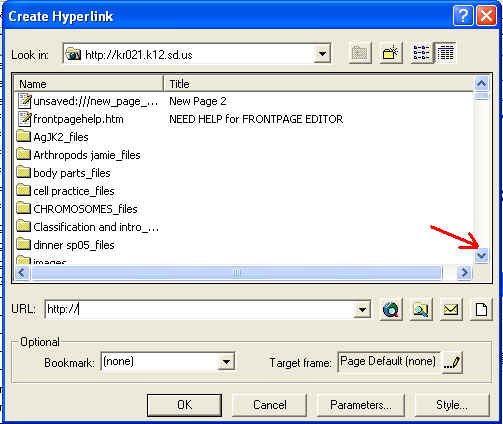
NEXT YOU MUST LINK YOUR WEBPAGE TO THE FILE.
1. Go to the place on your page where you want the link to begin and highlight it.
2.Choose
the hyperlink button. 
| 3. Scroll down until
you find the Powerpoint, spreadsheet, or word doc you want to link to.
Highlight it and choose OK. |
 |
4. Remember to save your webpage when you are through.
![]()
ADDING A BOOKMARK to somewhere else in the page
EX: If you click here it takes you to the top
1. You must first go to the place on
your page that you want to end up.
(Ex: I wanted you to go to the top of the page when you
clicked
here so I went to the top of my page
above and followed step #2)
2. Highlight the word. Go to
INSERT and then choose BOOKMARK.
It will automatically name it with whatever word(s) you
highlighted. (You can change this if you want.)
3. Choose OK.
4. Now go the the starting place on your page where you want the link to begin. (EX: I wanted the link to start on the word here above)
|
| 4. Highlight the word you want to start your link and on the menu bar at the top choose the HYPERLINK button (Globe with 2 chain links). |
| 5. Click on the arrow next to the bookmark window and the bookmarks for this page should appear. Choose the one you want to link to and click on OK. |
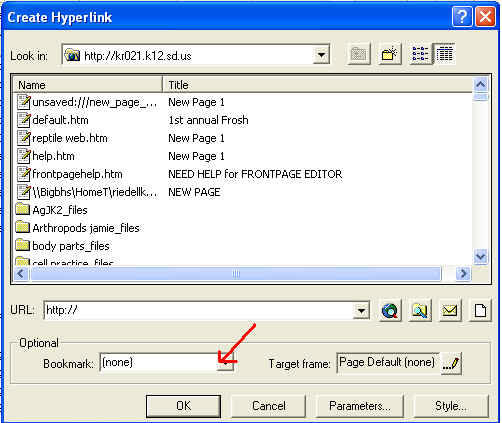 |
6. Don't forget to save your page.
Note: You can also bookmark pictures.
![]()
1. Open Internet Explorer and find an image you like. There are lots of sites that have free images to use.
2. Put your mouse arrow on top of the picture you wish to save and RIGHT CLICK. A menu will appear. Choose SAVE PICTURE AS.
Then use the arrow to change the folder to the place where you want to save it. You can save it to your My Documents, to a disc, to your jump drive, etc.
In the file name space make sure it is named something you will recognize. Sometimes images just have a number like bg04 and you won't recognize it later in your file when you want to know what it is.
3. Click on SAVE
![]()
SAVING A BACKGROUND DESIGN FROM THE WEB
You can save a background image from a website with backgrounds
(Follow directions for saving a picture)
OR
You can copy a background off a webpage you like.
1. Place mouse arrow on open area on the webpage. RIGHT CLICK with your mouse button and choose SAVE BACKGROUND AS.
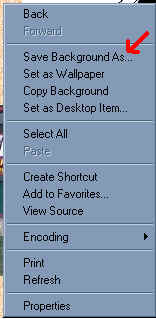
2. Then use the arrow to change the folder to the place where you want to save it. You can save it to your My Documents, to a disc, to your jump drive, etc.
Under file name make sure you name it something you will recognize later (ie. blue stripes rather than bl005)
3. Click on OK.
![]()
1. You can copy and paste a picture just like in WORD.
OR
2. You can insert a picture you have saved somewhere.
3. Under INSERT choose PICTURE then
FROM FILE.
Choose the File folder with the magnifying glass on the lower
right
and look for the file you want (in your hard drive, on a
disc, etc)
4. Choose the place you want to look for your picture. Then click on the picture you want and choose OK.
5. Under FILE choose SAVE. A window will appear showing the picture(s) you are inserting.
Make sure under FOLDER it says IMAGES. (You want your pictures to be saved in your images folder). If it doesn't, click on CHANGE FOLDER and make it say images.
6. Under ACTION it should say save. If it says OVERWRITE it means you already have a picture saved with that name and it will overwrite any previous picture. Watch what you are naming things so you don't lose old images already saved!
If you are just starting out and don't have many pictures this won't be a problem... you can probably just save it.
7. Then choose OK.
![]()
CHANGING THE COLOR OF YOUR PAGE
1. In the menu bar at the top under
FORMAT, choose BACKGROUND.
2. Click on the arrow to the right of COLORS BACKGROUND.
Color choices will appear. Click on the color you want from the choices
shown.
If you would like another color, choose MORE COLORS.
3. Once you have chosen your color, click on OK.
![]()
ADDING A BACKGROUND DESIGN from the web:
1. You must first save your background design.
2. On the menu bar at the top Choose FORMAT, then BACKGROUND.
3. Under Formatting click on the box in front of Background picture.
4. A white space will light up for you to use to identify the background you want. Click on the BROWSE button.
5. Then
click on the file folder with the magnifying glass button and you will be able
to use the arrow to find the place where your background image is saved (ie.
hard drive, disc, etc).
6. Click on the background image you want to use and then click on OK.
6. Don't forget to save your webpage.
![]()
1. Highlight the place on your page
where you want to have a link.
2. In the menu bar at the top click on the HYPERLINK BUTTON (It looks like
a globe with 2 chain links).

3. If you are linking to another of your own pages, your pages should appear in the window. Use the arrow to scroll down and choose the page you want to link to. Then click on OK.
If you are linking to an internet site. Type in the internet address in the URL window. Then click OK.
4. Don't forget to save your page.
![]()
ADDING A COUNTER
EX:
1. Place the mouse arrow on the page where you want the counter to be.
In the top menu bar under INSERT choose COMPONENT.
2. Choose HIT COUNTER.
3. A window will appear with
different styles of counters.
Choose one and click OK.
4. A little window will appear
on your page that says [HIT
COUNTER].
You won't actually see the numbers unless you are
viewing the page on the internet.
5. Don't forget to save your page.
![]()
EX:
1. On the menu bar at the top under INSERT choose COMPONENT, then MARQUEE.
2. Type in your message in the box.
3.To get your message to move the way you
want:
Choose scroll:
Choose slide:
Choose alternate:
4. Then Click on OK
5. Double clicking on your message will let you go back in and change it.
4. You can change font, size, and color by clicking on your message and using the menu bar on the top.
![]()
![]()

![]()
1. Find a picture you want to use for
your link and insert it.
(You can use the ones above)
2. Place mouse arrow over image and RIGHT CLICK.
3. Choose HYPERLINK.
4. Click on the picture of the
letter at the right.
5. Type in your email address.
6. Click OK
![]()
| Kelly Riedell | Jane Syltie | BHS Staff Homepages |
| Lori Olson | Sally Pies | Todd Jorgensen |
1. Click on insert table icon in top menu bar.

2. Use your mouse to drag arrow and choose number of columns and rows you would like in your table. Let go of mouse button and table will be inserted in your page.
L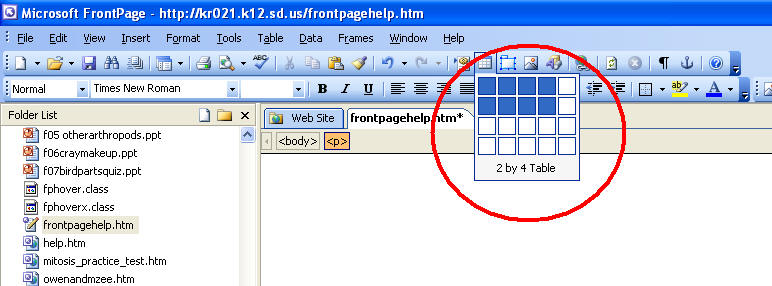
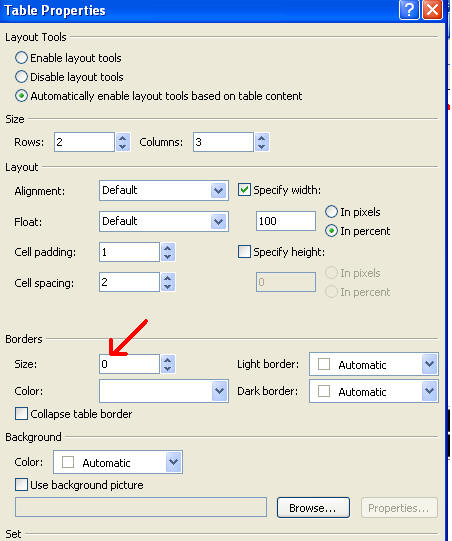
Make your table invisible like this:
| This table | but it allows you | without seeing |
| is invisible | to organize things on your page | the table outline |
1. Follow directions above for inserting a table.
2. Highlight table by putting mouse on top left box in your table, left click and keep holding button down, and drag mouse until table is highlighted, then lift your finger off the mouse button. Table will appear dark.
 |
3. Place arrow over highlighted table
and right click. Choose table properties. |
| 4. Set Borders Size to ZERO Then click on OK |
 |
